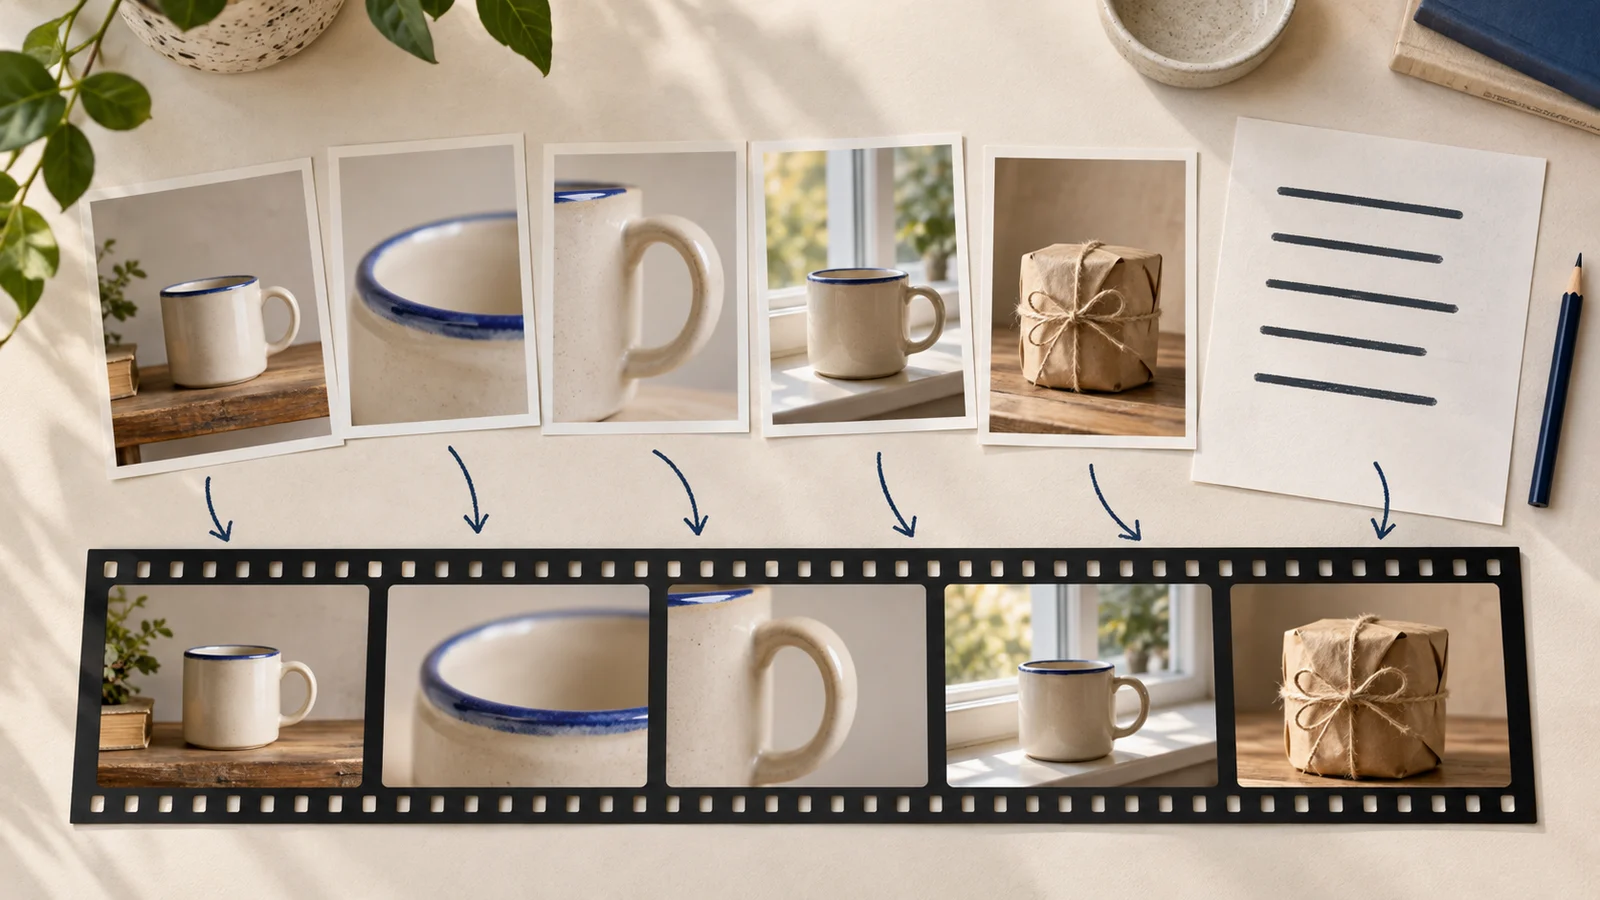
You have the photos. You have the words. What you need is a video that uses both correctly: the right image during the right sentence, with enough time to see what matters.
An AI video generator using your own images and script should help you build that sequence. Before generating, give each photo a job and pair it with a specific part of the narration. Then decide whether the photo should stay as supplied, be edited, or guide a newly generated scene.
In FrameSurfer, you can start with uploaded images and a written script. This guide shows how to prepare that brief, review the scene plan and check the result. The five-photo pottery example is illustrative; the images are editorial illustrations, not output from a tested FrameSurfer project.
Decide what “use my images” means
A photo can play three different roles. The choice matters before you spend time generating motion.
| Role | What you want | Example instruction |
|---|---|---|
| Keep the photo | Use this composition as the scene image or starting frame. | “Use the uploaded mug-on-shelf photo for scene one.” |
| Edit the photo | Change a specific part of the supplied composition first. | “Remove the loose paper behind the mug. Keep its position and shape.” |
| Use it as a reference | Create a new composition informed by the subject or style. | “Use this mug as a reference for a new breakfast-table scene.” |
These are instructions about the image's purpose, not three buttons you need to find. Describe the purpose in your FrameSurfer brief, then check that the planned scene reflects it.
Animating a photograph is another decision. It asks a model to create frames beyond the supplied image. Even if the first frame looks right, a handle, face, label or background can change during movement. “Use this as the starting frame” does not guarantee an unchanged object throughout the clip.
For a screenshot, diagram or product detail that must remain exact, a still-image sequence or a simple crop and pan in an editor may suit the shot better. Use generative movement where you can inspect and accept the changes.
If you are still choosing a workflow, start with our guide to AI video generators for product photos. It explains which kinds of tools fit different deliverables.
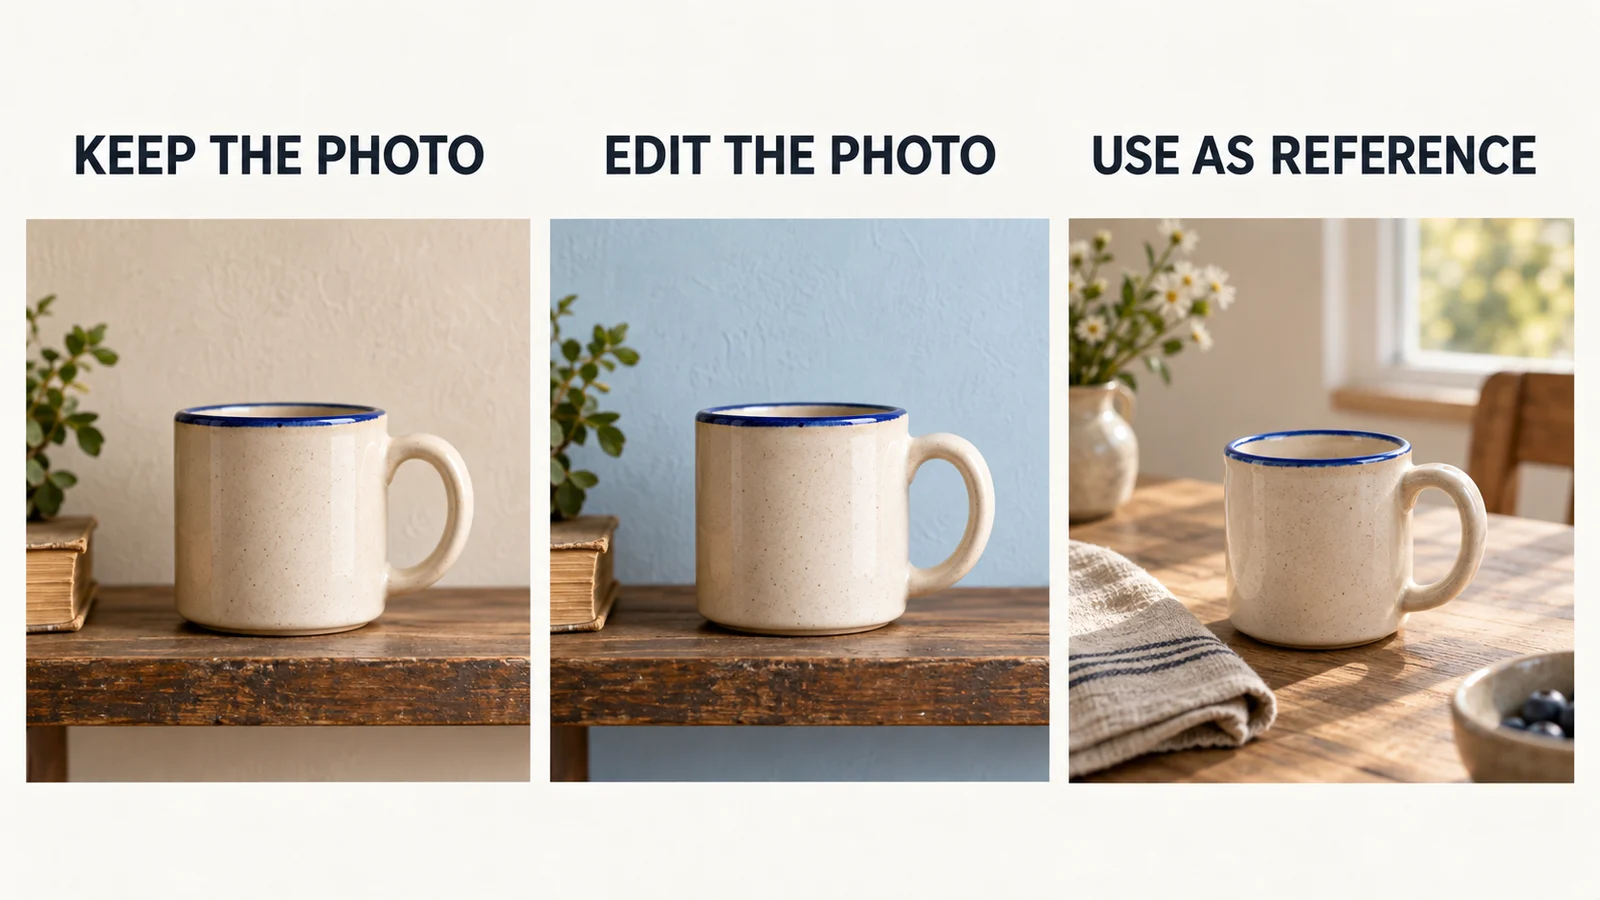
Editorial illustration: the same fictional mug serves three different purposes. These examples explain the brief; they do not demonstrate guaranteed image preservation.
Prepare a small set of useful images
Choose the images that support your message. A folder of twenty similar angles can be harder to direct than five clearly different shots.
For a short product introduction, you might need a complete product view, one distinctive detail, a second useful angle, a context shot and a closing image. For a lesson, those could be a question, a diagram, a worked step, an answer and a recap.
Check each file before uploading:
- Identify it clearly. Use names such as
01-mug-shelf.jpgand02-blue-rim.jpg. Also describe the visible subject in the brief; filenames alone should not carry the instructions. - Inspect the original. Remove an accidental duplicate or an out-of-date product version. AI cannot resolve which of two conflicting designs you meant to advertise.
- Check the intended crop. Preview a vertical crop if you want a vertical video. Make sure the rim, handle or diagram labels still fit.
- Leave room for text. Avoid putting essential detail exactly where you intend to place captions or a closing message.
A landscape photo is not automatically a useful vertical shot. If cropping removes the handle you are discussing, choose another image or a layout that preserves the full photo. Generating extra background is a creative change and needs its own review.
Keep the original files nearby. They are your comparison reference when reviewing generated scenes.
Pair five photos with five script beats
Here is a planning example for a fictional pottery studio introducing a blue-rimmed mug. The goal is a roughly 30-second video that introduces the design and invites viewers to browse the collection.
The times below are a starting plan, not a claim about a tested voiceover. Read the lines aloud and adjust the timing before treating them as final.
| Scene and planned time | Supplied image | Narration |
|---|---|---|
| 1 · 0–6 seconds | Complete mug on a shelf | “Meet the blue-rim mug, ready for your morning ritual.” |
| 2 · 6–12 seconds | Close-up of the blue rim | “A simple blue edge gives this quiet design its character.” |
| 3 · 12–18 seconds | Side view showing the handle | “Take a closer look at the curved handle and rounded shape.” |
| 4 · 18–24 seconds | Mug beside a window | “Picture a slow morning, a warm drink, and a little daylight.” |
| 5 · 24–30 seconds | Wrapped mug with space beside it | “Explore the collection and choose a mug for your daily pause.” |
This plan does two useful things. Each sentence has a visible subject, and each image has a reason to appear. Scene two discusses the rim while the viewer can actually see it.
Avoid adding unverified features to fill a line. “Dishwasher safe,” “locally made” and “keeps coffee hot for hours” are product claims. Include them only if they are true for the product you are showing.
You do not need five scenes for every video. If your message has three distinct beats, use three. If one photo supports two sentences, it can remain on screen while both are spoken. The table is a planning aid, not a mandatory shot count.
Give FrameSurfer a script and a separate visual brief
Start with Add images on the FrameSurfer homepage and supply your written brief. State the audience, format and intended length, followed by the scene plan.
Keep three kinds of text separate:
- Narration: the exact words the audience should hear.
- Visual direction: which uploaded image belongs here and what should happen in the shot.
- On-screen text: any separate title or closing message you want displayed.
That separation avoids an ambiguous paragraph such as “Show the blue rim and say this mug is ready for your morning ritual.” A scene-by-scene script makes your intended wording and image assignment easier to review than a loose description.
Use this brief structure, then add the remaining scenes from your plan:
Create a vertical video for people browsing our ceramic mug collection. Aim for 30 seconds across the five scenes below. Use the uploaded photos as the source images for their named scenes. Do not replace them with unrelated generated product shots.
Keep the supplied narration wording and scene order. Use a calm narrator. Treat visual directions as instructions, not spoken words. Add narration captions and keep them clear of the mug.
Scene 1 — 6 seconds. Image: the complete mug on the wooden shelf, file 01-mug-shelf.jpg. Narration: “Meet the blue-rim mug, ready for your morning ritual.” Visual direction: use this photograph as the starting frame; request only a gentle camera move. No separate title.
Scene 2 — 6 seconds. Image: the close-up of the blue rim, file 02-blue-rim.jpg. Narration: “A simple blue edge gives this quiet design its character.” Visual direction: keep attention on the rim; do not introduce new objects. No separate title.
Supply scenes three through five in the same format. For the closing shot, specify any separate text explicitly, such as “Explore the collection.” Use your actual destination in the post or advertisement that accompanies the video.
These instructions communicate the intended result; they are not a promise of flawless automatic placement. Review the script and source images before approving the draft. If timing is too tight, choose which words or scene lengths to change instead of accepting rushed narration.
For a recurring person or character, add an identity reference separately and explain its role. Our guide to consistent characters across AI video scenes covers that preparation in more depth.
Review the plan before generating the final video
Read the planned scenes against your original table. Confirm the order, narration, image assignment and any requested on-screen text. A request to keep your wording is useful only if the reviewed version actually contains that wording.
Then review the visuals. Check whether an image meant as the actual shot has become inspiration for a different composition. If so, clarify the source-image instruction before continuing. Likewise, an image that needs an edit should be checked after that edit and before animation.
Check the image when its line is spoken
Play through the sequence with the narration. At “blue edge,” the rim should be visible. At “curved handle,” the handle should be on screen long enough to inspect.
If a sentence starts over the previous photo, decide whether that transition helps or confuses. A short overlap can connect a story, but it is unhelpful when the spoken words identify a detail that has not appeared yet.
For each mismatch, locate the actual problem: the wrong image, the wrong scene order or insufficient time. Change that part of the draft and check the transition again. Increasing the total runtime does not automatically correct a misplaced image.
Check what changed during motion
Compare the generated shot with the original at the beginning, middle and end. Look closely at the detail that motivated the scene: the rim in scene two, the handle in scene three, and the wrapping in scene five.
A good opening frame is not enough if the object changes later. If the requested motion repeatedly damages an important detail, simplify the shot or retain the original photograph in the final edit. A clear still is useful when it shows something the viewer needs to understand.
Check captions after the visuals. Read names and product terms, watch the line breaks, and make sure text does not cover the detail being described. Listen once without watching, too; that makes a rushed phrase or awkward pronunciation easier to notice.
Fix the specific problem you can see
| Problem | What to check or change |
|---|---|
| The tool invents a different mug | Check whether the upload was treated as a reference. Clarify that this photo is the scene's source image. |
| The rim appears during the handle sentence | Compare the image assignment and scene order with your table. |
| The product looks right at first, then warps | Inspect the whole clip. Reduce the motion request or use the original still in an editor. |
| The narration feels hurried | Read that scene's line aloud. Shorten it or give it more time before rebuilding. |
| A vertical crop removes the subject | Use a better source image or a layout that keeps the complete image visible. |
| A direction is spoken aloud | Separate narration from visual notes and correct the reviewed script. |
After a correction, watch the neighboring scenes as well. A longer scene can change the pace of the transition even when its own image now looks right.
Export and check the file you will post
Once the sequence is ready, build and export the video from your FrameSurfer project. Check the output format and dimensions against the destination you chose at the start.
Open the downloaded MP4 and watch it from beginning to end. Confirm the image order, narration, captions and closing message. Listen on a phone speaker and check that any background audio leaves the narration clear. Review this file before posting; the editor preview is not the file your audience will receive.
Choose the workflow by the control you need
FrameSurfer is a relevant starting point when you want to combine supplied images and a script with generated scenes in one video project. Make the source-image brief explicit and review the resulting draft.
If your main requirement is placing unchanged images against exact passages of narration, compare that requirement separately. NarraCut's manual image workflow documents assigning an uploaded image to a selected continuous passage of script. That word-selection interface is NarraCut's feature; it is not a FrameSurfer control described here.
If you prefer assembling your assets in an editor, CapCut's script-to-video guide describes a local-materials route for supplied photos and clips. Check the options in your app before planning around that workflow. These are documented alternatives, not results from a hands-on comparison.
For your first project, keep the brief manageable: a clear message, a few purposeful images and narration matched to each scene. Bring that plan into FrameSurfer, review the draft against your originals, and judge the finished video by whether viewers see the right thing when they hear about it.