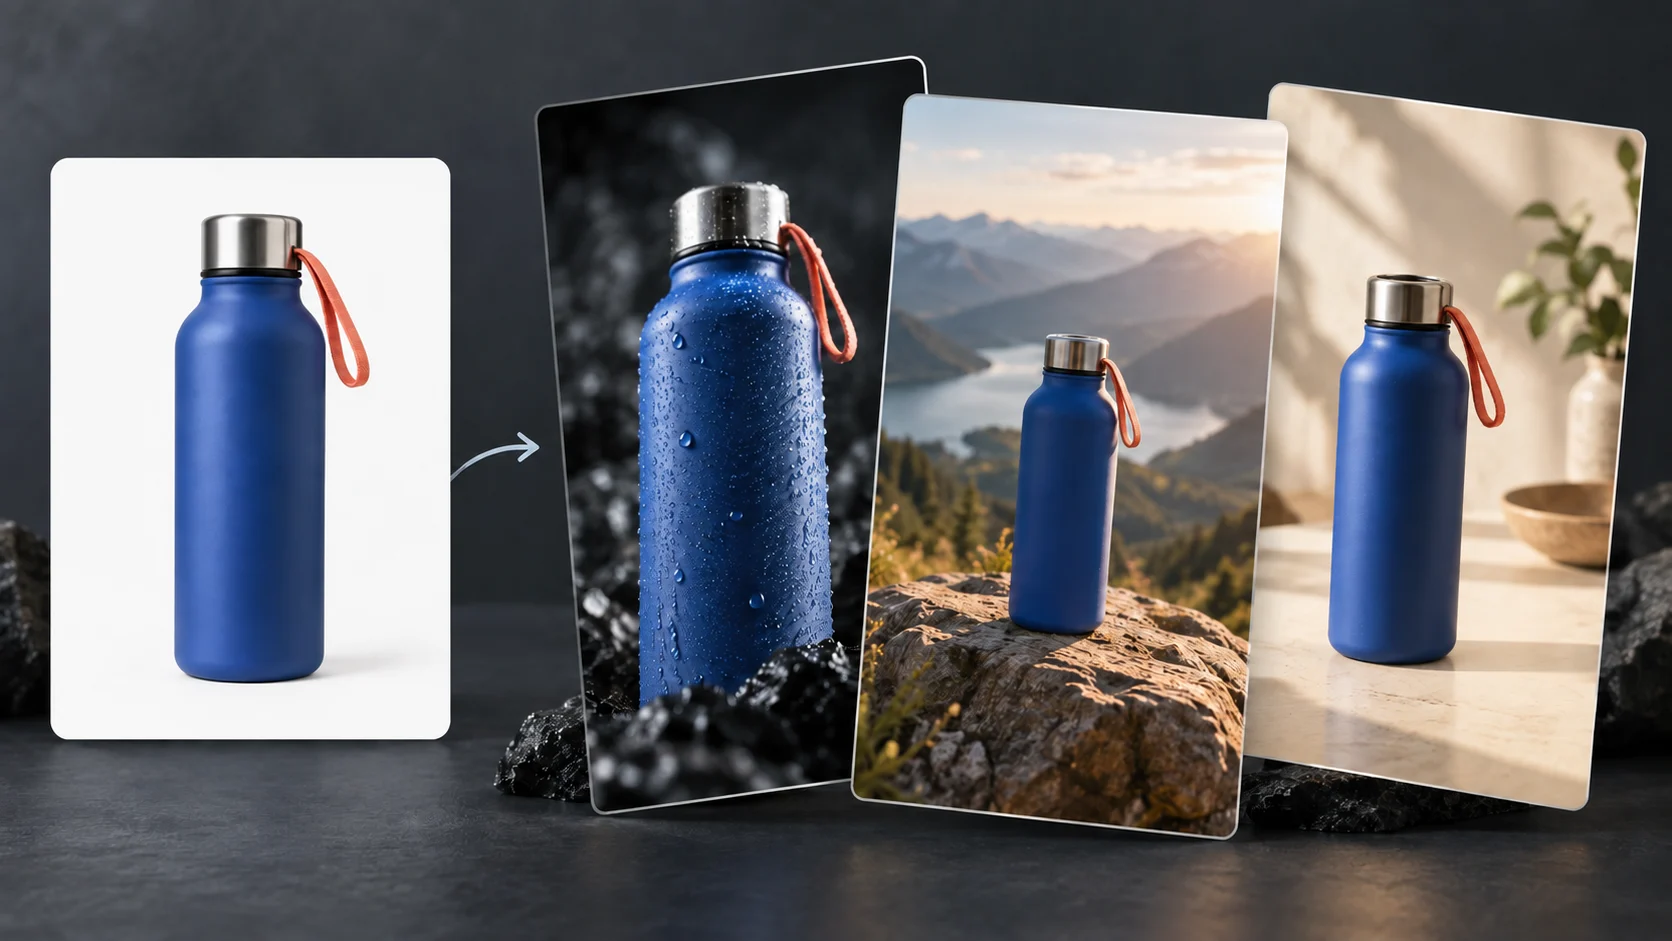
The best AI video generator for product photos depends on what you need to finish. An animated product shot, a narrated social ad and a set of campaign variations involve different work. Start by choosing the deliverable, then compare tools against it.
For an editable video built around a product story, consider FrameSurfer. For photo-led motion inside a product-image workflow, look at Photoroom. For advertising-focused creative variations, assess Creatify. For directing individual generated shots, examine Runway.
Use the comparison and sample brief below to find a workflow that fits your assets and budget.
FrameSurfer publishes this guide. The comparison uses official product documentation checked on September 19, 2026; it is not a hands-on quality benchmark. The bottle images are AI-generated editorial illustrations of a fictional product, not outputs from a comparative tool test.
Decide what “photo to video” means for your project
The phrase covers several jobs. A tool can be useful for one without completing the others in the same way.
An animated shot adds generated movement to a product image: a camera move, changing atmosphere or movement around the object. You may still need to assemble the clip, add text and decide what the video says.
A product ad needs a message and a sequence. It may combine a product introduction, a feature detail, an everyday use and a call to action. Narration, captions, music and editing can matter as much as the opening visual.
A campaign variation changes the hook, presentation or creative treatment so you can compare approaches. Generating several versions does not establish that any one will perform better; that requires an actual campaign test.
Finally, sometimes you only need your existing photograph on screen with a crop, a gentle zoom and a text overlay. That is a valid video treatment when preserving the exact product image matters more than inventing new motion.
Before choosing a tool, write: “I have these photos, and I need this finished video.”
Four tools to consider, by the work you need done
The table is a shortlist by workflow, not a ranking of output quality. Follow the linked documentation and check the current plan before subscribing.
| Tool | Consider it for | What to investigate in your trial |
|---|---|---|
| FrameSurfer | A product story with scenes, narration, captions and editing | How your references carry through the scene plan and final video |
| Photoroom | Product-photo preparation and generated motion assets | Whether the video feature is included in your plan and suits the intended shot |
| Creatify | Advertising-oriented product creative | Which product-video or ad workflow matches the format you need |
| Runway | Directing individual image-to-video shots | Motion control, acceptable takes and remaining assembly work |
FrameSurfer: build around the complete product story
FrameSurfer combines an idea and references with a scene-based video workflow. Its plans include tools for images, video, narration, music and captions, with MP4 export.
Consider it when your task includes explaining the product, choosing a sequence and finishing a social video. Give the brief your real product facts as well as the images. Review the proposed message and scenes before judging the generated result.
The key check is whether the video presents your particular product accurately and communicates the intended message. A convincing-looking setting cannot compensate for an incorrect item. If you want a detailed production walkthrough after choosing this route, see our product demo video guide.
Photoroom: connect product imagery with motion
Photoroom's video generator starts from product images and supports templates or custom prompts. Its wider image tools make it relevant when preparing the source photo is a significant part of your work.
Check the subscription requirement carefully. The current iOS help article says video generation uses AI credits and specifies Max and Ultra Spaces in its instructions.
A sensible evaluation is a product-focused shot you can inspect closely. If your intended deliverable is a narrated, multi-scene ad, verify how you will produce and edit that whole sequence as part of your comparison. Do not assume a product-video example answers every production requirement.
Creatify: evaluate the advertising workflow you actually need
Creatify's Product Video page describes generating product visuals from an image and presents both cinematic product and UGC-style treatments. It also distinguishes Product Video from its URL-to-ad and avatar tools.
That makes it worth considering when your priority is advertising creative. First identify the route that matches your concept: a close-up product shot, a presenter-led explanation or an ad assembled from product information.
Check each route's inputs, editing options and current charges. Treat advertised speed, savings and campaign outcomes as vendor claims rather than predictions for your business. Your own product and intended message are the useful basis for a trial.
Runway: direct the motion of individual shots
Runway's image-to-video guidance separates the role of the input image from the motion instructions. The image establishes much of the appearance; the prompt describes action and camera movement.
Consider this route when the shot itself is your main creative task and you want to work on its direction. Use your trial to establish whether you can obtain the motion you want while retaining the details that matter.
Account for selecting takes, assembling the sequence and checking text. Compare the work required to deliver the finished ad.
Prepare photos that answer the important visual questions
Before uploading, decide which details the video must show accurately. For a bottle, that might include the shape, cap, color and label. For shoes, it may be the silhouette, sole, stitching and colorway.
Choose a clear main image. Add an angle or detail image when it supplies information needed by a planned shot. Keep photographs from different product versions separate. A reference pack containing two similar bottles with different lids is an avoidable source of ambiguity.
Give each asset a job:
| Asset | Intended use |
|---|---|
| Main product photo | Establish the overall appearance |
| Detail photo | Show a real feature that the main image does not reveal |
| Lifestyle photo | Supply a setting or an existing scene you want to use |
| Logo or closing graphic | Provide a clean asset for the finished edit |
Then explain whether you want an image retained, animated or used as a reference for a newly generated scene. Those are different requests. A reference guides a new image; it should not be treated as a promise that every original pixel or printed word will remain unchanged.
Avoid asking the generator to reveal an unseen mechanism or the back of a product when accuracy depends on details your photographs do not show. Supply that information or choose a shot that does not need it.
Use one small brief to compare your options
A fair trial starts with the same intended result. The example below uses our fictional blue bottle. Replace its details with facts and assets from your actual product.
Create a 20-second vertical product video from the supplied bottle photos. Introduce the bottle, show its carry loop and finish with a clear product view. Keep its blue body, silver cap and coral loop recognizable. Use a calm outdoor mood. Add the supplied copy as editable text where the workflow allows. Do not invent insulation, durability or sustainability claims.
The scene plan can stay compact:
| Section | Target time | Picture | Copy or purpose |
|---|---|---|---|
| Opening | 5 seconds | Clear product view | Establish what is being shown |
| Detail | 5 seconds | Close view of the carry loop | Highlight one visible feature |
| Context | 5 seconds | Product in a suitable everyday setting | Suggest an occasion for use |
| Closing | 5 seconds | Clean product shot | Add your accurate name and next action |
These are planning timings, not generator settings. Record any editing required to reach the target.
For an individual motion shot, start with a restrained direction:
A slow camera push toward the upright bottle. Soft daylight shifts across the blue surface. The bottle remains closed and stationary on the tabletop.
Inspect that result before adding more action. A dramatic spin or a hand opening the cap may be relevant later, but it introduces additional details to judge. The first trial should answer whether the basic product presentation is usable.
In FrameSurfer, include the product photos, target format and message in the brief, then review the script and scene direction. The same brief is useful elsewhere even if you need separate steps or apps to complete it.
Inspect the product throughout the shot
Do not approve a clip based only on its thumbnail. Watch the full shot and pause where the product moves, turns or becomes partly hidden.
Check the details that could change what a customer thinks they are buying:
- Shape: body, edges, proportions and distinctive parts.
- Color and material: the correct variation and a believable finish.
- Branding: spelling, logo, label placement and readable information.
- Function: no invented lid, pocket, attachment or mechanism.
- Continuity: the same item remains visible across the sequence.
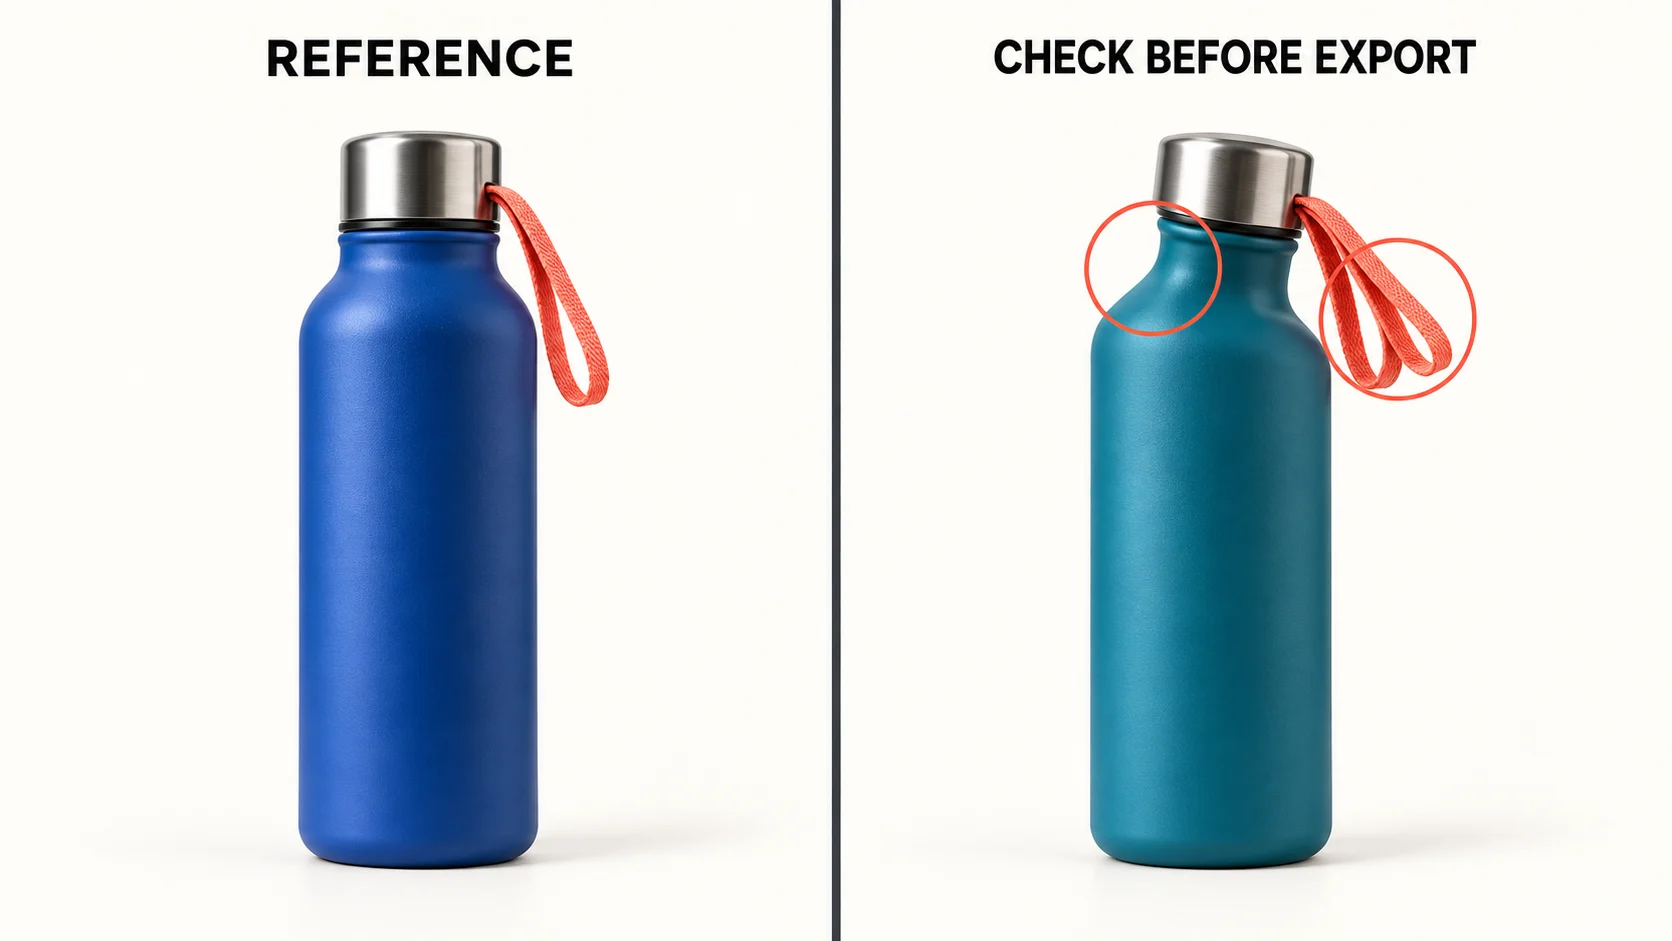
Illustrative inspection exercise: the right-hand bottle was deliberately designed with errors. It is not a result from any tool in this comparison.
If packaging text changes during generation, consider keeping the original product image for the label-focused shot and adding your copy in the editor. You can reserve generated scenes for parts of the story where the exact printed detail is not the main evidence.
For a real product demonstration, use real footage when the actual movement or performance is what you need to prove. An attractive generated scene can illustrate a concept, but it does not demonstrate a product's measured capabilities.
Compare the cost of finishing, not only the subscription
Record what happens during your own trial. Useful entries include the selected plan, generation settings, number of attempts, usable output length and any extra tool needed to finish the edit.
Separate these two numbers: the cash you must pay to access the workflow, and the share of its allowance consumed by one project. They answer different budgeting questions.
For example, if a hypothetical test produces six clips and you use three, the rejected clips still belong in that test's production record. This is a counting example, not a typical retry rate or a claim about any provider's billing rules. Check whether each attempt actually incurs a charge.
Also record hands-on time. A low generation bill may still leave substantial work in asset preparation, corrections, assembly and captions. Conversely, an existing subscription may already provide enough capability for a simple shot.
FrameSurfer publishes its current plans and credit model. Check the cost shown for the production steps you choose rather than assuming a monthly credit balance guarantees a fixed number of finished ads.
Make the decision on one finished example
For each candidate, note what it produced, what you corrected, what still needed another tool and whether the final video represented the product accurately. That record will tell you more than a universal “best” label.
If you need a product story with scenes, narration and captions, start with your photos and brief in FrameSurfer. Review the message, check the product in every shot and build the first ad around one clear reason to care.