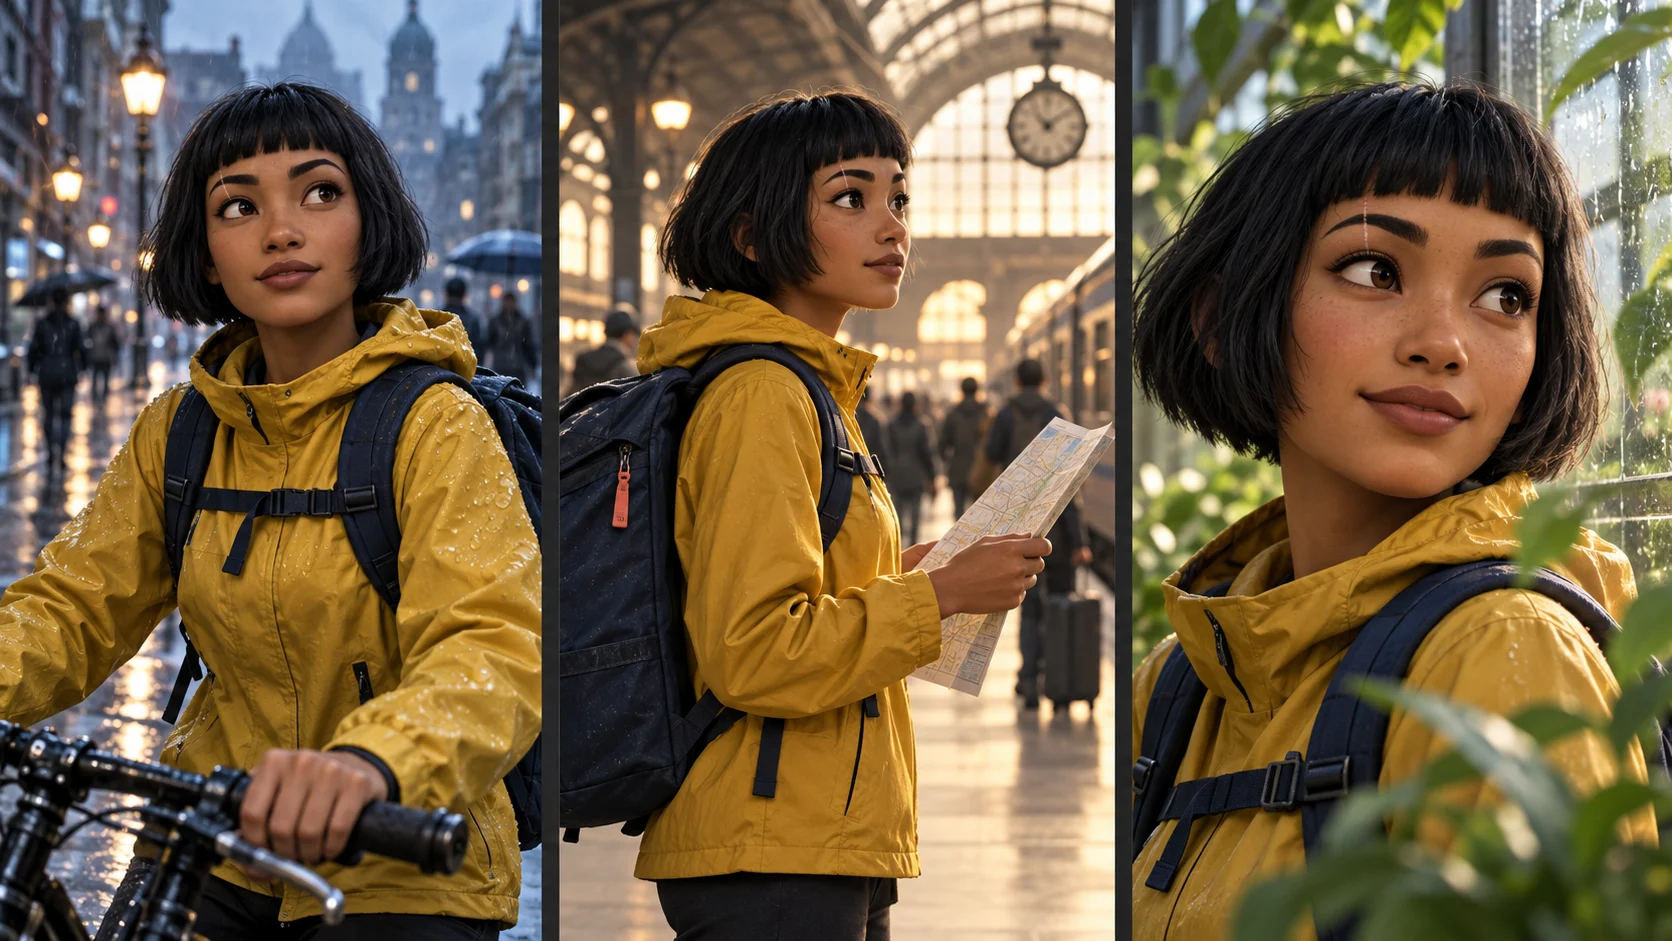
Keeping the same character across AI video scenes starts with a clear visual reference, a small set of fixed details and a review of each shot. Give the generator a stable character to work from, then change the action, setting and camera direction deliberately.
If you are choosing an AI video generator for consistent characters, look beyond the quality of its first portrait. Check how it reuses references, lets you review scenes and handles a shot that needs replacing. Those controls matter once your character has to appear more than once.
This guide gives you a practical reference-and-review workflow, a reusable character brief and a short scene plan. We will use Tess, a fictional bicycle courier, to make the decisions concrete.
The character artwork in this article is AI-generated editorial illustration. It explains the planning method; it is not a FrameSurfer video test or a guarantee of identical results.
What needs to stay consistent?
A character can look different under station lights and rainy daylight while still looking like the same person. The goal is to preserve the features that establish identity while allowing the story to move.
Before generating scenes, separate those two things:
| Keep stable | Change when the story calls for it |
|---|---|
| Face shape, skin tone and recognizable facial features | Expression and gaze |
| Haircut, hairline and usual hair color | Wind or movement in the hair |
| Body proportions and overall silhouette | Pose and camera distance |
| Outfit during a continuous sequence | A planned wardrobe change between sequences |
| Distinctive accessories and recurring props | What the character is doing with a prop |
| The chosen illustration or photographic treatment | Location, lighting and atmosphere |
This becomes your acceptance checklist. A slightly different smile may fit the scene. A new face, jacket or backpack may break the sequence.
Build one useful character reference
Start with an image in which you can judge the character clearly. Avoid making your only reference a distant figure, a face hidden behind sunglasses or a heavily shadowed portrait.
For an original character, settle the design before building the whole story. For a real person, use images you have permission to use and that represent the appearance you want in the video.
Our recommended starting pack is a clear face view and a wider view of the outfit. Add another angle only when it explains something missing, such as a distinctive backpack. Several contradictory references make the intended design harder to communicate.
In FrameSurfer, start with your approved character reference and describe the features you want to keep stable. Its saved-character workflow lets you reuse a character across videos; still review each scene for changes.
For broader reference-image advice, Runway's official guidance also recommends clear, evenly lit images. Attachment controls vary by tool.
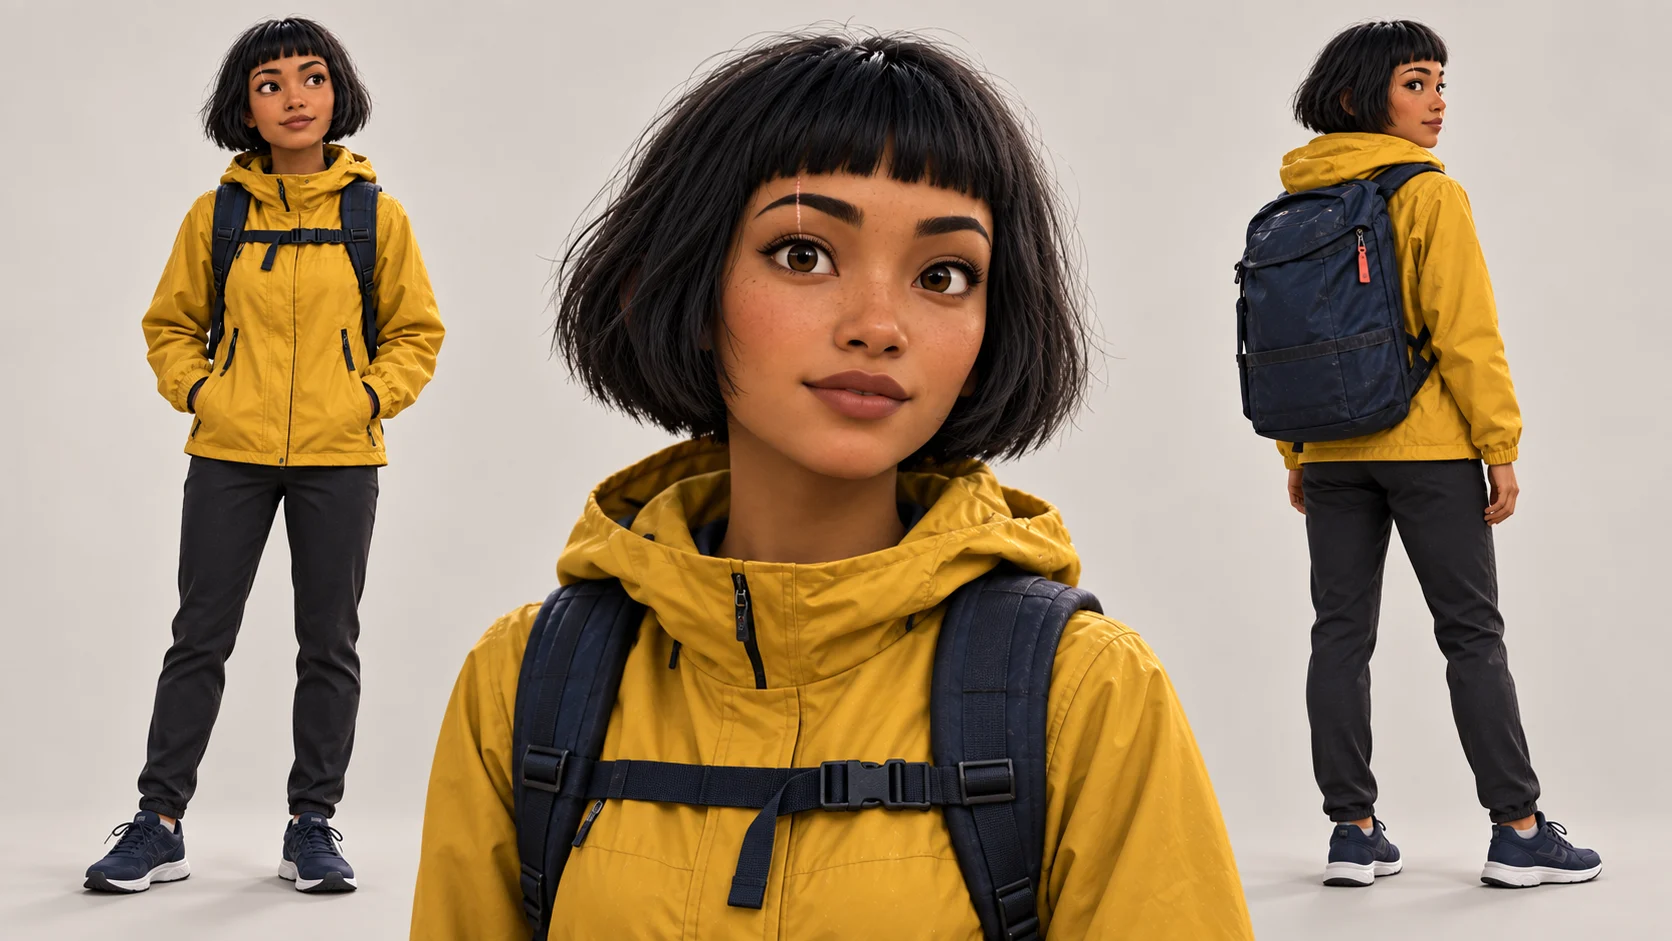
Planning example: the face, jacket and backpack are visible separately. Review a generated reference sheet for contradictions before using its individual views.
A reference sheet is a planning aid. Do not assume every generator should receive the entire collage as one image. A crowded sheet can leave the tool choosing between several poses. Use the relevant individual view when the tool supports that approach, and follow its input guidance.
Write a short identity brief
Keep a compact written description beside the reference. It gives you something consistent to reuse and helps you spot changes you did not request.
Here is the brief for our example:
Character: Tess, an adult bicycle courier. Warm brown skin, short black bob with a blunt fringe, and a small eyebrow scar. Mustard-yellow rain jacket, black trousers and navy trainers. Navy backpack with a coral zipper pull. Contemporary animated-film illustration. Her face, haircut, outfit and backpack stay consistent throughout this delivery.
The reference carries the visual detail; the brief identifies what matters. A character's name alone does not specify their appearance. Keep the description focused on the essential features.
Plan the scenes before changing the character
Write the story beats without redesigning the subject in each one. A useful scene plan names the location, visible action and continuity check.
For Tess, the idea is simple: she follows a delivery address through a rainy city and discovers a greenhouse inside an old station. Here is an illustrative 30-second plan. The timings are editing targets, not a claim about any tool's generation lengths.
| Shot | Target | Visual | Check before accepting |
|---|---|---|---|
| 1 | 6 seconds | Tess stops her bicycle outside the station | Face, haircut, yellow jacket |
| 2 | 6 seconds | She studies a folded map in the concourse | Same jacket and backpack; believable hands |
| 3 | 6 seconds | Close-up of the map beside a doorway | Map and location still make sense |
| 4 | 6 seconds | She looks through the greenhouse window | Recognizable face under different light |
| 5 | 6 seconds | Tess smiles as she reaches the delivery destination | Same outfit; a clear ending |
The insert shot of the map gives the viewer useful information without needing another close-up of the face. This is also a practical way to vary the edit while keeping the story easy to follow.
Use the fewest shots that communicate your idea clearly. If every shot introduces a new outfit, location, prop and camera angle, you have many more decisions to review. Our video production planning guide can help organize a larger project.
Keep identity instructions separate from shot instructions
Each scene needs a new action, not a new character description. Reuse the approved identity and reference, then describe what changes.
For example, the station image brief could be:
Use Tess's approved character reference. Medium shot in a warm railway concourse. Tess studies a folded paper map. Her mustard rain jacket and navy backpack with the coral zipper pull are visible. Keep the established character design and animated-film treatment.
Once you have a suitable still, the motion direction has a different job:
She lowers the map slightly and looks toward the doorway. A slow camera push moves closer to her face. Background commuters move gently through the station.
For an image-to-video scene in FrameSurfer, use the approved still as your visual starting point and describe the motion you want next. Our AI video prompt guide has examples of actions and camera movement you can adapt.
The image establishes the appearance; the motion prompt describes how it unfolds. Runway's image-to-video documentation explains the same distinction as supporting reading.
Treat these prompts as starting points, not guaranteed recipes. Adapt them to the model and controls you use. If an instruction produces an unwanted result, change the relevant part and compare the next attempt with the same reference.
Keep spoken narration separate from visual direction too. A narrator can explain that Tess has found the address without asking the visual model to render readable street numbers, a detailed map and a complicated action at once.
Review stills, then review the moving shots
When your workflow supports an image-first stage, inspect the scene image before animating it. A wrong face in the starting image is already a reason to pause.
Place the candidate beside the approved reference. Check the face first, then hair, clothing, proportions and props. Judge the image at the size people will watch it, and enlarge any detail that is central to the story.
After animation, inspect the whole clip. A correct opening frame does not prove the character stays recognizable during a turn or camera move. Check the start, middle and end, then watch normally to judge the action.
Ask three questions:
- Would someone recognize this as the same character without the caption telling them?
- Does anything change during the shot that the story does not explain?
- Does the cut into the next scene preserve the character and the action?
Where FrameSurfer fits in this workflow
FrameSurfer is relevant when you want the character to appear in a complete, editable story video. Its plans include saved characters that can be reused across videos, alongside tools for scenes, narration, music and captions.
Start with your story idea and character reference. Explain which appearance details should remain stable, the intended format and the story's main action. Review the script and scene direction before moving through generation, then inspect the resulting visuals and finish the timing and text in the editor.
A useful starting brief for our example would be:
Make a short vertical story about Tess, the courier in my reference image, following an unusual delivery address into a station greenhouse. Keep her face, bob haircut, yellow jacket and navy backpack consistent. Use gentle narration and a warm, curious mood. Plan the scenes around the delivery rather than adding unrelated action.
Confirm that each generated scene represents the intended character before treating the video as finished.
If you already have dialogue or narration, prepare that separately using our script-to-video guide. Keeping the story text clear makes it easier to judge whether the visuals are doing the right job.
Repair the scene that breaks continuity
When a shot fails, write down the specific problem before changing the prompt. “It looks wrong” does not tell you what to fix.
| Problem | First thing to check | A practical next attempt |
|---|---|---|
| The face changes between scenes | Whether the intended reference was applied | Reuse the approved reference and simplify the new scene direction |
| The outfit changes | Conflicting wardrobe descriptions or reference images | Keep one explicit outfit for that sequence |
| A prop changes shape | Whether the reference actually shows the prop clearly | Supply a clearer permitted reference or choose a simpler framing |
| A still looks right but motion distorts it | The action or camera move where the change begins | Try a more restrained motion request or a shorter usable segment |
| The character feels different despite matching clothes | Face, proportions and overall visual treatment | Compare against the original identity, not only the preceding shot |
These are diagnostic suggestions, not guaranteed corrections. If a new attempt still fails, consider whether the shot is necessary. A simpler angle, an insert or a still with deliberate editing may communicate the same beat more clearly.
Keep the original approved reference available throughout production. If you use a later output as an additional reference, inspect it first. Otherwise you may carry an unwanted change into the next scene.
Choose a generator by its continuity controls
Before committing to a longer project, check four things: how you supply a character reference, how it carries into another scene, how you review the output, and how you replace a weak shot.
Also check the cost of continuing. Count accepted scenes, rejected attempts and any extra assembly work in your own small trial. A subscription price alone will not tell you what your particular story costs to finish. FrameSurfer's current plans and credit explanation describe its allowance and charging model; review the cost shown for your chosen production steps.
For a first project, begin with one character and a short sequence. Approve the design, keep the important features stable and inspect each transition. Once that workflow produces a result you are happy with, expand the story.
Start a character story in FrameSurfer with your reference and a clear brief. The most useful first milestone is a recognizable character across a few connected scenes.